As an Amazon Services LLC Associates Program participant, we earn advertising fees by linking to Amazon, at no extra cost to you.
How to Ensure a Strong Bond
Creating a strong bond in any arts and crafts project starts with communication, whether it’s with fellow crafters or my own thoughts. I advocate for openly sharing ideas and techniques that spark our creativity. Collaboration can lead to exciting new projects. Whether it’s joining a local crafting group or engaging with online communities, the support and feedback from others can cement our connections. I find that sharing my progress and challenges amplifies my passion. Make it a habit to express appreciation for others’ work—this reciprocity deepens relationships. Trying out projects together, whether virtual or in person, creates lasting memories. Finally, don’t forget the importance of nurturing your own creative voice; it strengthens the bond you have not only with others but also with your craft. Embrace the collective journey we share in the world of arts and crafts!
Preparing Your Surfaces for Maximum Adhesion
Surface preparation is crucial for any craft project that involves adhesion. Unsurprisingly, the success of your glue, paint, or adhesive tapes relies heavily on how well you prepare your surfaces. Start by cleaning the surface thoroughly to remove dust, grease, and oils; I cannot stress enough how this simple step can make or break your project. A clean surface allows for better bonding and longevity.
Sanding or lightly scuffing glossy surfaces can significantly improve adhesion. Using fine-grit sandpaper creates a texture for the adhesive to grip onto, while also helping to remove imperfections. For porous surfaces, consider applying a primer or a sealing agent. This creates a uniform surface, allowing the adhesive to adhere more effectively.
Remember, every project is unique, and adapting your surface preparation methods will lead to optimal results. Don’t underestimate the importance of this step; it’s truly the foundation of any successful craft endeavor!
Key characteristics of effective adhesives
Understanding the essential traits of effective adhesives can significantly enhance your arts and crafts projects.
- Versatility is crucial. The best adhesives can bond a variety of materials, from paper and fabric to metal and plastic. This flexibility allows me to use the same glue for multiple projects without worrying about compatibility.
- Quick drying time is essential. I prefer adhesives that set rapidly, eliminating the wait and allowing me to continue my project without interruptions. This is especially vital in time-sensitive creations.
- Strong bond strength cannot be overlooked. An effective adhesive must create a durable bond that can withstand stress and strain, ensuring my creations last for years without falling apart.
- Ease of use matters. A great adhesive should come in an easily manageable applicator that prevents mess and frustration. I appreciate glues that apply evenly and cleanly.
- Non-toxic formulas are a must. Since many of my projects involve children, I prioritize adhesives that are safe and non-toxic, ensuring a worry-free crafting experience.
Common Mistakes to Avoid When Using Glue
One major mistake is using too much glue. It’s tempting to slather it on, but a thin layer often does the trick and prevents messiness. Another common error is ignoring drying times. Rushing could ruin your project entirely! Always check the manufacturer’s guidelines. Mixing different types of glue can also be disastrous. Not all adhesives play well together, and this can lead to weak bonds or even chemical reactions. Using the wrong glue for the material is a cardinal sin. For instance, school glue won’t work on heavy-duty projects. Lastly, neglecting safety precautions is a definite no-no. As a passionate crafter, I cannot stress enough the importance of using gloves or working in a ventilated space, especially with super glues. Avoid these pitfalls, and your crafting experience will be much smoother!
Oct 30, 2023 … … bonding glass components. They cure … adhesives provide a reliable bond for furniture with plastic components attached to wooden frames.
The Glue That Holds It All Together: Types of Adhesives Used in …
Safety tips while working with adhesives
Adhesives can be a fantastic tool in arts and crafts, but safety should always come first. Here are my essential tips to keep you safe while unleashing your creativity.
- Always work in a well-ventilated area. Some adhesives can release fumes that may be harmful or unpleasant.
- Wear gloves. Protect your hands from sticky substances and potential irritants. It’s easy to get caught up in crafting and forget about how messy adhesives can be!
- Keep adhesives out of reach of children and pets. Ensure that your crafting space is safe so that curious little hands don’t get into potentially hazardous materials.
- Read the labels. Understand the specific safety recommendations for each adhesive you use. Each product can have different precautions.
- Test a small area first. When using a new adhesive, always test it on a small section of your project. You don’t want any surprises!
- Store adhesives correctly. Follow storage instructions to keep products safe and extend their shelf life. Proper storage prevents unnecessary accidents.
Jun 4, 2015 … PVA or other white glue like Tacky Glue sticks glass to wood pretty tightly and permanently, depending on what you're doing with it.
Jan 6, 2020 … How to glue glass to wood. When gluing wood to glass, it's important to consider what will happen to any excess glue when it dries. Choose a …
Dec 20, 2016 … There's a fantastic website called This to That (Glue Advice) that … Usually, one does not bond wood and glass together with an adhesive …
How to adhere glass to wood: Common methods. The hard, non-porous surface of glass makes it difficult for most adhesives to stick to it. … site and services …
When used for mixed applications (acrylic to wood) the bond is pretty strong. I used this glue for my shaker ornaments and although with a lot of force they …
A Comprehensive Guide to Gluing Acrylic – Danielle Wethington
Maintenance Tips for Glass-Wood Projects
Taking care of glass-wood projects requires regular attention to keep them looking fabulous. First, I always recommend cleaning the surfaces with a soft, lint-free cloth. This simple habit prevents scratches and keeps the glass pristine. Avoid using harsh chemicals that can damage wood finishes or cloud glass. Opt for a gentle solution or even warm soapy water when necessary.
Check for signs of wear, like scratches on glass or fading paint on wood. For minor scratches, a glass polish or wood touch-up marker can work wonders. Regularly inspect joints and edges to catch any potential issues before they escalate. A little glue can save a project from needing a complete overhaul!
Lastly, keep the project away from direct sunlight to prevent discoloration. With a little care, your glass-wood creations can shine for years.
Understanding the Different Types of Glue
Choosing the right glue can make or break your projects. Each type serves a unique purpose, and understanding these can elevate your crafting experience. For paper crafts, liquid glue or glue sticks work wonders. They create smooth, even bonds without the mess of some heavier adhesives. If you’re working with fabric, fabric glue is a game changer. It’s designed to endure washing and movement without losing adhesion, making it perfect for wearable art or home decor. Hot glue guns, while versatile, can be your best friend or worst enemy. They provide quick bonding but require caution, as the hot tip can cause burns. For wooden projects, wood glue is specifically formulated to bond timber securely, ensuring lasting durability. Lastly, epoxy glues are fantastic for heavy-duty tasks. They cure to form incredibly strong bonds, suitable for metals and ceramics. Understanding these glue types empowers you to tackle any craft challenge with confidence!
Types of Projects that Use Glass and Wood Adhesives
Exploring the amazing projects you can undertake using glass and wood adhesives unleashes creativity while ensuring durability. Here are some fantastic options you should consider.
- Furniture Restoration: Reviving old furniture requires precision. Using wood adhesive helps secure joints while glass can be used for decorative elements, enhancing the piece’s aesthetic.
- Home Decor: Creating unique wall art or decorative panels with glass and wood can transform any room. The clarity of glass against the warmth of wood adds a touch of elegance.
- Crafting Picture Frames: Picture frames made from wood with glass fronts are timeless. They protect your memories while offering a beautiful display.
- Custom Shelving Units: Building shelves using wood with glass inserts creates a modern look. This blend not only supports your books but also showcases your decor brilliantly.
- Model Building: For hobbyists, constructing models with glass details on wooden bases adds realism. Proper adhesive ensures stability and longevity.
- Garden Projects: Wooden planters with glass accents can beautify your garden. The combination brings a fresh vibe to outdoor space, making it more inviting.
Step-by-Step Guide to Gluing Glass to Wood
Gluing glass to wood is a straightforward yet rewarding task. I recommend using a high-quality adhesive like epoxy or a specialized glass glue for the best results. Start by cleaning both surfaces thoroughly to remove any dust or grease. Next, apply the glue to one surface—don’t overdo it; a little goes a long way. Press the glass firmly onto the wood, ensuring proper alignment. Hold it in place for a few minutes, allowing the glue to set. You might want to use clamps to secure the pieces as they dry, which usually takes 24 hours for full strength. Be patient and resist the urge to move them! Once everything is cured, you can finish by sanding any rough edges or applying a sealant for added protection. This project not only enhances your crafting skills but also creates stunning pieces for your home.
Essential Tools for Your Glue Project
A well-equipped workspace makes a world of difference in your glue projects. Here’s my take on the must-have tools that will enhance your crafting experience.
- Hot Glue Gun: This tool should be your top pick. It melts glue sticks to form strong, instant bonds, which are perfect for a variety of materials. The versatility it offers is unmatched.
- Glue Sticks: Don’t scrimp on quality! Opt for the right type of glue sticks that suit your project. They come in different sizes and strengths, so you’ll want to choose wisely.
- Craft Knife: A sharp craft knife is essential for precision cutting. Whether you’re trimming paper or shaping materials, this tool provides the control you need for clean edges.
- Scissors: A good pair of scissors is indispensable. Look for ones that are comfortable to use and can cut through various materials without snagging.
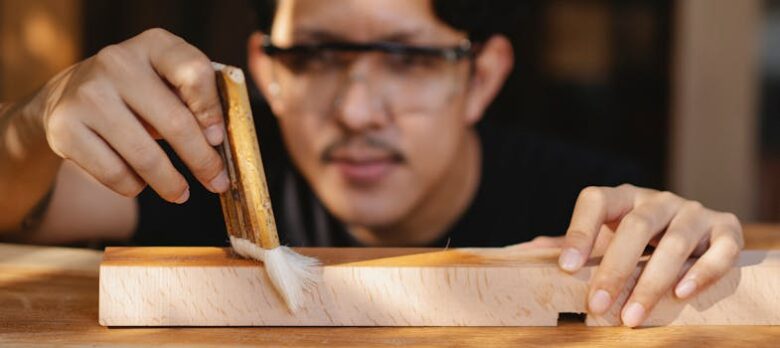
- Paintbrushes: If your project involves glue that needs to be spread, quality paintbrushes will help apply evenly without clumping. They’re handy for adding details too.
- Ruler: Measurement is key in crafting, and a sturdy ruler helps ensure everything is aligned just right. It’s a simple tool that brings precision to your projects.
- Cutting Mat: Protect your surfaces! A cutting mat helps prevent damage and gives a cushioned base for cutting, making it a must-have for serious crafters.
Tips for Working with Glass and Wood in Crafts
Glass and wood might seem like an odd pair, but they complement each other beautifully in crafts. I’ve discovered that clear glass brings light and depth to rustic wood projects, creating stunning contrasts. Here are some essential tips I swear by: First, always wear safety gear when cutting or sanding either material; trust me, a single slip can lead to injury. Use the right tools for each task. For wood, a saw is crucial for clean edges, while glass cutters are essential for precise shapes. When gluing, invest in a strong adhesive that works on both surfaces; I prefer epoxy for its durability. Don’t forget to sand wooden surfaces beforehand. This roughness allows for better adhesion, especially when combining elements. Lastly, experiment with different finishes, whether it’s varnishing the wood or etching the glass for a unique touch. Trust your instincts, and have fun creating!
Creative Project Ideas Using Glass and Wood
Combining glass and wood in creative projects can lead to stunning results. I love the contrast of these materials—the warmth of wood alongside the fragility of glass creates a unique aesthetic that simply captivates. One of my favorite projects is crafting a glass terrarium with a wooden base. This project not only allows you to play with different plant arrangements but also makes a striking centerpiece for any room.
Another idea is to build a wood frame for your glass artwork. By framing your favorite glass pieces, you can showcase them beautifully on your walls. Coasters made from wood slices topped with glass accents are practical and visually appealing. These coasters protect your surfaces while adding a touch of custom artistry to your home. Lastly, consider creating a layered glass and wood lamp—this project combines function with incredible design flair. Dive into these projects and watch your creativity soar!
Environmental factors affecting glue performance
Understanding the impact of various environmental factors is crucial for ensuring the effectiveness of the glue you choose for your arts and crafts projects.
- Temperature can drastically alter glue behavior. Extreme heat can cause glue to soften, while cold can lead to brittleness.
- Humidity levels influence drying time. High humidity can slow down the curing process, leaving you waiting longer than anticipated.
- Surface material matters. Some glues bond better with porous surfaces, while others excel on non-porous materials.
- Direct sunlight can degrade certain adhesives. UV rays can weaken the bond over time, especially in outdoor crafts.
- Dust and debris can hinder adhesion. It’s essential to ensure surfaces are clean and dry for optimal performance.
- Chemical exposure can alter glue effectiveness. Paints, solvents, or cleaners near your glue can impair its bond and longevity.
Best Adhesives for Bonding Glass and Wood
Finding the right adhesive for bonding glass and wood can be frustrating. For me, the winner has always been epoxy. Its strength and durability make it a go-to choice for various projects. If you’re designing something that needs to withstand wear and tear, epoxy is what you want. I also appreciate that it fills gaps, which is a real lifesaver when dealing with imperfect surfaces.
Another solid contender is cyanoacrylate glue, commonly known as super glue. This adhesive sets quickly and offers a strong bond, perfect for smaller projects. However, I’ve learned that it’s not the best option for larger areas or structural work.
Finally, don’t overlook silicone adhesives. They provide a flexible bond and are great for projects that might need a bit of movement. Each adhesive has its strengths, and knowing the right one for your task can truly elevate your project’s outcome.
What type of glue works best for glass to wood?
For bonding glass to wood, I advocate for using a strong epoxy adhesive. This type of glue is designed to create a rigid bond, making it perfect for various crafts. Make sure to choose one specifically labeled for glass and wood to ensure the best results. Alternatively, I’ve had success with cyanoacrylate glue (super glue) for smaller projects. Always remember to clean both surfaces thoroughly before applying the adhesive. This ensures a solid connection and minimizes the chances of failure down the line. Happy crafting!
How do I prepare the surfaces before gluing?
Start by cleaning the surfaces you plan to glue. Dust, dirt, and oils can ruin your bond. I’ve learned that using rubbing alcohol or soap and water works wonders. Make sure to let the surfaces dry completely. If there are any rough edges, sand them down; it helps the glue grip better. Finally, ensure the pieces fit together properly before applying glue. Having a clear understanding of how they’ll align saves so much time and frustration later!
Can I use regular super glue for glass and wood?
Absolutely, you can use regular super glue for both glass and wood, but you need to know its limitations. I’ve had mixed results with it on wood, especially if the surface is rough or porous. For glass, super glue works well for small repairs, but it might not hold up against moisture or heavy stress. I recommend using a glue specifically designed for glass if you want a more secure bond. Always test on a small area first to avoid disappointment!
What should I do if the bond fails?
If your bond fails, don’t panic; there’s always a way to fix it. First, assess the failure—was it due to inadequate surface preparation, or did you choose the wrong adhesive? Identify the root cause as your first step. Next, clean the surfaces thoroughly to remove any debris or old adhesive remnants. A good scrubbing can work wonders. If necessary, apply a primer to improve adhesion. Don’t be afraid to switch adhesives! Explore stronger options or those better suited for your materials. Lastly, give yourself time; allow the bond to cure fully before handling the project. Learning from these hiccups can actually strengthen your future crafting endeavors.
How long does it take for the glue to dry?
The drying time for glue can vary significantly depending on the type used. For instance, hot glue typically sets within minutes, while white craft glue might take a few hours to dry completely. Always check the manufacturer’s instructions for the most accurate drying times. I’ve personally learned the hard way that impatience can ruin a project—trust me! If you’re crafting something delicate, plan for at least a full day to ensure everything is securely bonded. Ultimately, allowing extra time before handling your crafts will yield better results.
Are there any specific care instructions for glass-wood projects?
When caring for glass-wood projects, prioritize gentle handling. Avoid using harsh chemicals that can damage both glass and wood finishes. Instead, opt for a soft, damp cloth for cleaning. Regular dusting is essential to prevent scratches and preserve the beauty of the piece. For wooden components, a suitable wood conditioner can enhance durability and shine. Be mindful of temperature fluctuations and humidity, as they can warp wood and crack glass. Keep these projects away from direct sunlight to maintain their vibrancy.
Can weather conditions affect the adhesive’s performance?
Absolutely, weather plays a crucial role in how adhesives perform. I’ve faced frustrating situations where high humidity or extreme temperatures have ruined my projects. Adhesives can become less effective in cold weather, making them brittle, while heat can cause them to soften and lose their grip. Don’t underestimate how these elements can impact your creativity! When working with glues and tapes, it’s essential to check the manufacturer’s guidelines for optimal conditions. This will save you time and effort in the long run. Always keep the weather in mind to ensure your creations stick together just as they should!
Proper surface preparation is essential for strong adhesion. I’ve found that cleaning, sanding, or priming surfaces can make all the difference in my projects. Don’t skip this step!
Don’t overlook the basics! Skipping essential steps leads to frustrating outcomes. Invest time in preparation and technique. This effort guarantees your projects achieve their full potential and longevity.
Always prioritize safety while crafting. Whether using sharp tools or hazardous materials, protecting yourself should never take a backseat. Trust me, your creative projects are best enjoyed when you feel secure.
Without the correct adhesive, even the most brilliant projects can falter. I’ve learned this the hard way. Whether it’s glue, tape, or a specialized bond, the right choice can transform your craft from mediocre to magnificent.
Using glass and wood in your crafts opens up endless possibilities. **They add elegance and warmth to any project.** I’ve discovered unique combinations that truly inspire creativity—giving traditional crafts a refreshing twist!
As an Amazon Services LLC Associates Program participant, we earn advertising fees by linking to Amazon, at no extra cost to you.