


As an Amazon Services LLC Associates Program participant, we earn advertising fees by linking to Amazon, at no extra cost to you.
Common Mistakes to Avoid in Embroidery
One of the biggest mistakes is choosing the wrong fabric. Always consider the weight and texture of the fabric as it directly affects the stitch. Not using stabilizers is another key error. Stabilizers are crucial to prevent distortion, especially in delicate fabrics. Many beginners underestimate the importance of thread quality. Low-quality thread can lead to fraying and breakage, ruining your project. Failing to test your design before stitching on the final piece is a mistake I’ve made. Always test on a scrap piece to ensure your design looks exactly how you envisioned. Ignoring tension settings can also be detrimental. Misadjusted tension results in uneven stitches, so make sure to check it regularly. Finally, not learning proper finishing techniques leaves many projects looking unprofessional. Invest the time to master them for a polished finish.
Step-by-Step Guide to Starting Your Butterfly Embroidery
Gather your materials first. You’ll need embroidery fabric, thread in vibrant colors, a needle, and an embroidery hoop. Choose your favorite butterfly design or sketch one out; this step is crucial for achieving the look you want. Next, secure the fabric in the hoop. This will keep your work tight and manageable. If you’re using a design template, transfer it onto the fabric with a water-soluble pen. Begin stitching with a simple backstitch for outlines. Focus on getting smooth, even lines. Once the outline is complete, fill in the wings using different stitches like satin stitch or French knots for texture. Experiment with colors. Blending different shades will give your butterfly depth and vibrancy. Finally, tidy up any loose threads at the back, and voilà, you’ve created your butterfly embroidery piece!
Choosing the Right Butterfly Embroidery Kit
Selecting the perfect butterfly embroidery kit can make or break your crafting experience. First, consider your skill level; beginners should look for kits labeled as easy, which often include clear instructions and all necessary materials. Look for high-quality embroidery floss and fabric, as this will impact the final outcome of your project. Pay attention to the design complexity. If you’re confident in your abilities, opt for intricate patterns, but if you’re unsure, stick with simpler designs to avoid frustration. Check for additional features such as pre-printed fabric, hoop inclusions, and whether the kit comes with a guide or tutorials. Finally, consider the theme or colors; choose a butterfly design that resonates with you. A good choice will keep you engaged and inspired throughout the entire process, making every stitch feel rewarding.
Key Features to Look for in a Kit
Identifying essential components in a crafting kit can enhance your creative experience.
- Quality Materials: Always opt for kits that use high-grade supplies. Cheap materials can lead to frustration and unsatisfactory results.
- Clear Instructions: Look for kits that provide comprehensive, easy-to-follow instructions. Clear guidance ensures you can execute projects successfully.
- Versatility: Choose kits that allow for a range of projects. This flexibility opens pathways for experimentation and creativity.
- Skill Level Appropriateness: Select kits designed for your skill level. A kit too advanced can lead to discouragement, while one too easy may bore you.
- Inclusion of Tools: Kits that come with necessary tools save you the hassle of searching for items. Having everything you need enhances your crafting experience.
- Creativity Encouragement: I favor kits that inspire unique ideas. Look for those that provide additional suggestions or variations you can explore.
- Community or Support: Some kits offer access to online groups or forums. Being part of a supportive crafting community can enrich your experience.
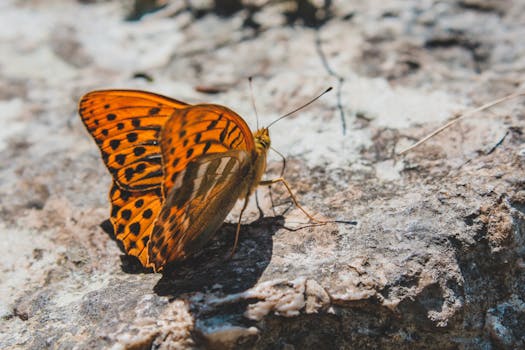
Top 5 Butterfly Embroidery Patterns
Embroidery is a delightful way to express creativity, and butterfly patterns are a favorite among enthusiasts for their intricate designs and vibrant aesthetics. Here are my top picks that I believe will inspire your next project.
- 1. Monarch Butterfly – This classic design features the striking orange and black color scheme associated with the monarch, offering an opportunity to practice your layering and shading techniques. It’s a timeless choice that stands out.
- 2. Swallowtail Butterfly – With its elegant curves and intricate wing patterns, the swallowtail is a favorite among those who love detailed work. The variety of colors allows for creativity in thread choices, making each piece unique.
- 3. Vintage Butterfly – A retro-inspired pattern that captures a sense of nostalgia. This one is perfect for those who enjoy a romantic aesthetic, often featuring soft pastels and delicate stitching.
- 4. Geometric Butterfly – For a modern twist, this minimalist pattern uses facets and shapes to create a contemporary look. It’s simple yet striking, perfect for quick projects or decorating home goods.
- 5. Floral Butterfly – Combining butterflies with floral elements, this design is whimsical and cheerful. The blend of techniques from flora work enhances the complexity, and the result is absolutely breathtaking.
Exploring Different Embroidery Techniques
Embroidery opens up a world of creativity, allowing us to transform fabric into stunning art. I’ve tried various techniques, and each offers its own unique flair. The basic backstitch is my go-to for outlining designs; it creates clean lines and is exceptionally easy to master. For texture, nothing beats satin stitch. It fills areas with vibrant color and a luxurious sheen. Recently, I’ve been entranced by machine embroidery; it’s fast and produces intricate designs that would take hours by hand. If you’re up for a challenge, give free-motion embroidery a shot. You can sketch with the needle and create astonishing freehand patterns that have a personal touch. Lastly, don’t overlook cross-stitch; it’s a classic that never goes out of style, perfect for beginners and experienced crafters alike. Each technique opens new doors for creativity, inviting us to experiment and express ourselves through needle and thread.
Tips for Choosing the Right Fabric
Make your fabric selection easier and ensure successful projects with these essential tips.
- Know Your Project Requirements: Determine the purpose of your fabric. Whether it’s for clothing, quilts, or crafts, the right type is crucial.
- Consider the Weight: Fabrics come in various weights. Lighter fabrics are great for flowy garments, while heavier ones work well for upholstery or structured pieces.
- Check the Fabric Content: Natural fibers like cotton or linen breathe well, while synthetic options like polyester may add durability but less breathability.
- Feel the Texture: The texture influences how the fabric drapes and feels on the skin. Always touch and, if possible, wash a sample before committing.
- Look for Colorfastness: If vibrant colors are essential, choose fabrics that won’t bleed when washed. Always check if a material is colorfast.
- Assess the Stretch: Some projects need stretch. Familiarize yourself with how different fabrics behave when pulled or manipulated.
- Think About Maintenance: Consider how much care you want to give your fabric. Think about washability and ironing needs to fit your lifestyle.
Ideas for Displaying Your Finished Butterfly Embroidery
Framing your butterfly embroidery is a classic way to showcase your handiwork. Choose a frame that complements the colors of your embroidery to make it pop. A shadow box adds depth, allowing you to include additional elements like dried flowers or even a handwritten note about your crafting experience.
Using an embroidery hoop as a frame is another clever method. Paint the hoop in a coordinating color to enhance your design and hang it on the wall for a charming presentation.
For a more dynamic display, consider creating a rotating gallery wall with multiple pieces of butterfly embroidery. It keeps your space fresh and gives your work the spotlight it deserves.
Finally, display them on a decorative stand on your mantel or a shelf. This approach offers versatility, allowing you to change the display easily. No matter how you choose to display, your butterfly embroidery will undoubtedly add a unique touch to your decor.
Essential Materials for Your Embroidery Project
The foundation of any great embroidery project starts with quality materials. You’ll need a good pair of embroidery scissors; they should be sharp enough to give clean cuts but small enough for precision. Fabric choice is crucial; I always prefer cotton or linen for their durability and ease of stitching. Selecting the right thread is vital too. I enjoy using cotton embroidery floss for its versatility and vibrant colors, but rayon offers a beautiful sheen for added elegance. A sturdy embroidery hoop helps keep your fabric taut, making it easier to stitch. Don’t overlook needles; I opt for embroidery or crew needles, as they work well with various thread types. Lastly, having a good light source can make a big difference in tackling the finer details. With these materials, you’ll set yourself up for a successful and enjoyable embroidery experience.
Oct 7, 2022 … Got your embroidery kit from tata sol? Now you can stitch with Noa! Look at this playlist to find your kit and start stitching. Step by step embroidery kits …
Check out our butterfly embroidery kit selection for the very best in unique or custom, handmade pieces from our kits shops.
The butterfly embroidery pattern part 2 On my previous post I wrote a little about my pattern tutorial process and I thought it would be good to share…
Emillie Ferris Embroidery – The butterfly embroidery pattern part 2 …
Mar 21, 2016 … … Kit Beginner Embroidery Kit Modern Embroidery Kit DIY Embroidery Kit … Rainbow Butterflies 10 Machine Embroidery Designs set 4×4. Rainbow …
Hand Embroidery: Satin, Straight, Herringbone Stitch (Butterfly)
Jan 25, 2020 … In this post, I'm reviewing this gorgeous butterfly embroidery kit from Hawthorn Handmade, a company that supplies craft kits for beginners!
Butterfly Embroidery Kit Review – Hawthorn Handmade – Craftaholique
Joining a Butterfly Embroidery Community
Joining a butterfly embroidery community can radically enhance your crafting experience. I’ve found that these communities are welcoming hubs of creativity filled with like-minded individuals who share a passion for embroidery. They offer a plethora of resources, from patterns to stitch guides, often developed by experienced crafters keen on sharing their knowledge. Engaging in these groups not only sharpens your skills but also inspires new projects. The camaraderie is palpable; you receive feedback, support, and advice tailored to your level. Regular challenges and themed projects spark motivation, pushing you to explore techniques you may have never considered. Sharing your progress and receiving encouragement from fellow members is incredibly fulfilling. Additionally, community forums and social media groups provide round-the-clock access to tips and tricks that enrich your practice. Ultimately, being part of a butterfly embroidery community transforms solitary crafting into a shared artistic adventure.
Recommended Brands for Quality Kits
Here are some standout brands that deliver exceptional quality arts and crafts kits.
- Michaels: I love their diverse selection of arts and crafts kits, especially for beginners. You get clear instructions and quality materials that inspire creativity.
- ArtBin: Their storage and organization kits are game-changers! They help keep my supplies neat, making it easier to focus on projects without the clutter.
- Dover Publications: They offer fantastic coloring and craft kits that ignite nostalgia while providing a creative outlet for both kids and adults.
- Klutz: Their kits are excellent for kids and adults alike! They come with everything needed for fun projects, from knitting to paper crafting.
- Tombow: Known for their dual brush pens, their calligraphy and watercolor kits are perfect for enhancing your art skills and making your work pop.
Incorporating Butterfly Embroidery into Home Decor
Butterfly embroidery can infuse a touch of whimsy and nature into your home decor. I love using it in various projects, from cushion covers to wall art. Consider creating a series of framed butterfly designs to hang in a gallery wall arrangement; this adds vibrancy and character to any space. For a softer touch, stitching butterflies onto throw pillows brings a cozy, inviting feel to your living room. Choosing a color palette that complements your existing decor is crucial. Delicate pastels can blend beautifully with light interiors, while bold, colorful threads can make a striking statement against darker backgrounds. In addition, adding butterfly embroidery to table runners or napkins can elevate a dining experience, making even everyday meals feel special. If you’re up for it, a large embroidered butterfly mural on a feature wall can become an eye-catching focal point in a child’s bedroom or playroom. Ultimately, the choices are endless and can reflect your unique style.
List of Basic Embroidery Stitches to Know
Mastering basic embroidery stitches opens up a world of creative possibilities. Each stitch has its unique flair and application, perfect for any project you can dream up.
- Running Stitch: The simplest stitch, essential for outlines or adding texture. It’s versatile and a must-learn for any beginner.
- Backstitch: Offers a solid, defined line that’s perfect for lettering or detailed designs. I find it gives a polished look that’s hard to beat.
- Chain Stitch: This stitch forms a lovely, decorative chain. Its fluidity works wonders for floral designs and adding dimension.
- Satin Stitch: Ideal for filling shapes, this stitch creates a smooth, shiny surface. Use it to bring bold colors and textures to life.
- French Knot: These little knots add beauty and whimsy. They’re fantastic for creating dots or floral accents that pop.
- Split Stitch: Offers a textured effect that stands out. I love using it for outlines or shading in my designs.
- Whipped Stitch: A great way to finish edges or create texture. It adds detail that can transform an ordinary piece into something extraordinary.
The Benefits of Crafting with a Butterfly Theme
Crafting with a butterfly theme adds a vibrancy that instantly elevates any project. The delicate nature of butterflies inspires a sense of fragility and beauty, which resonates in various art forms, from painting to paper crafts. Using butterfly motifs can spark creativity and innovation. Each butterfly is unique, inspiring us to explore different color palettes and techniques, embracing our individuality as crafters. When I work on butterfly-themed projects, I often find a deeper connection to nature, creating a sense of mindfulness that enhances my overall crafting experience. Additionally, butterflies are universally loved symbols of transformation and renewal. This theme can motivate others and brings a sense of joy and hope, making our crafts resonate with audiences. Lastly, butterfly-themed crafts are perfect for any occasion, whether it’s decor for a birthday party or a heartfelt gift. This versatility enriches our crafting enjoyment and outreach.
As an Amazon Services LLC Associates Program participant, we earn advertising fees by linking to Amazon, at no extra cost to you.
What supplies do I need for a butterfly embroidery project?
To create a stunning butterfly embroidery, you’ll need some essential supplies. Start with high-quality embroidery floss in vibrant colors for the butterfly’s wings. You’ll also need a needle that is suitable for embroidery, preferably a size 5 or 7. Fabric choice is crucial; cotton or linen works best. An embroidery hoop will help keep your fabric taut and manageable. Don’t forget scissors for trimming threads and a water-soluble pen for marking your design. Lastly, a pattern or design reference can guide your stitching. Having these supplies will make your crafting experience enjoyable and productive!
How long does it take to complete a butterfly embroidery kit?
The time it takes to complete a butterfly embroidery kit varies widely based on skill level and the kit’s complexity. For beginners, it can take anywhere from 5 to 10 hours, as you navigate basic stitches and techniques. If you’re experienced, you might complete it in 2 to 4 hours. Don’t rush the process; enjoy the creative journey and let the artwork evolve at your pace. Each stitch contributes to the overall beauty, making it a worthwhile experience regardless of time spent.
Can beginners successfully use butterfly embroidery kits?
Absolutely! Butterfly embroidery kits are designed with beginners in mind, featuring user-friendly patterns and complete supplies. The step-by-step instructions provided make it easy to follow along. I’ve found that these kits offer a perfect blend of simplicity and creativity, allowing new crafters to produce beautiful artwork without feeling overwhelmed. Many kits even include helpful tools, ensuring you have everything needed to get started right away. As someone who started with a similar kit, I can confidently say that it’s a fantastic way to build skills and confidence in embroidery.
What’s the best way to maintain my embroidery tools?
Regular cleaning of my tools is essential. I wipe my needles and scissors with a soft cloth to remove any residue. Proper storage is key. I keep my scissors in a protective case and store needles in a magnetic holder to avoid accidents. I also occasionally oil my sewing machine to keep it running smoothly. Replace any worn-out tools promptly. Dull scissors and rusted needles can ruin a project. Finally, keep my workspace organized to prevent tool damage and ensure everything is easily accessible for my next creative task.
Are there online resources for more butterfly embroidery patterns?
Absolutely! The internet is filled with amazing resources for butterfly embroidery patterns. Websites like Etsy and Pinterest offer a variety of downloadable designs from talented artisans. I also highly recommend checking out craft-focused forums and Facebook groups where members often share their own patterns for free. Don’t overlook YouTube tutorials, which can provide both visual guidance and patterns. For those who enjoy printed materials, sites like Amazon have books dedicated to embroidery techniques and patterns, including butterflies. Happy stitching!
How can I customize my butterfly embroidery designs?
Choosing your colors is the first step in customization; select shades that resonate with your style or the intended decor. You can also modify the patterns—add unique elements like flowers or geometric shapes around the butterfly. Experiment with different stitch types to create texture and depth. Incorporating personalized text or monograms can make your piece truly one-of-a-kind. Don’t forget to explore various fabric choices—each will bring a different vibe to your design. The beauty of embroidery lies in its flexibility; let your creative instincts guide you!
Where can I find a local embroidery group or community?
The best place to start is through social media platforms and dedicated crafting websites. Look for local Facebook groups or Instagram accounts focused on embroidery. Many communities host regular meet-ups and workshops that you can join. Additionally, check local craft stores or community centers, as they often have bulletin boards with information on embroidery classes and groups. Don’t overlook online forums like Reddit or specialty websites where passionate embroiderers gather to share tips and forge connections. These platforms can lead you to nearby enthusiasts eager to collaborate and share techniques.
Butterfly embroidery is an exceptional technique for sharpening crafting abilities. This intricate art form not only improves your stitching precision but also inspires creativity through vibrant designs and unique patterns.
Displaying your creations connects you with others and showcases your individuality. It’s rewarding to share your artistry, inspiring both yourself and fellow creators to explore their own talents.
Being part of an arts and crafts community fuels creativity and motivation. Engaging with others offers unique perspectives, ideas, and constructive feedback that can refine our skills and spark new projects.
Choosing the right arts and crafts kit can transform your creative process. The right tools inspire confidence and enable you to achieve your artistic vision without unnecessary frustration.
**Trying out various stitching techniques consistently enhances my projects.** Each method adds unique texture and dimension, allowing creativity to shine through in unexpected ways. **Don’t hesitate to explore new possibilities!**
Embroidery is undeniably a meditative and relaxing pastime. The rhythmic motions and focus required promote mindfulness, allowing stress to fade away. I find it rejuvenating, making it an ideal escape from daily life.
Mistakes are vital in the learning process. I’ve found that my best projects often emerge from errors. Instead of fearing failure, I celebrate it. Each blunder is a chance to innovate and grow creatively.


