


As an Amazon Services LLC Associates Program participant, we earn advertising fees by linking to Amazon, at no extra cost to you.
Inspiration from Advanced Embroidery Projects
Advanced embroidery projects can transform fabric into stunning art pieces. I’ve often found myself captivated by intricate designs that showcase not just skill, but also creativity. Techniques like free-motion embroidery allow for expressive, fluid designs, breaking the boundaries of traditional patterns. Experimenting with mixed media adds a layered texture that you won’t find in basic projects. Incorporating beads, sequins, or even fabric paint can elevate a simple embroidery piece into a multi-dimensional masterpiece. I’ve seen remarkable pieces that blend embroidery with photography, creating a narrative that resonates on multiple levels. Choosing unusual colors or varying thread weights can result in bold statements and unexpected outcomes. The possibilities are endless, and every stitch can tell a story. As I explore these advanced techniques, I’m constantly inspired to push my own boundaries and integrate these beautiful elements into my work.
Choosing the Right Embroidery Fabrics
Choosing the right fabric for embroidery is crucial for achieving stunning results. For my projects, I typically recommend using cotton fabric, as it is not only easy to work with but also holds stitches beautifully. Linen is another fantastic option if you’re after a more textured finish. It’s strong, durable, and has a unique appearance that elevates any design. For those who enjoy a bit of stretch, consider incorporating knits or t-shirts, though they can be tricky. You’ll need stabilizers to prevent the fabric from puckering. If you’re looking for something lightweight, organza can add an ethereal touch but requires a delicate hand. Silk is luxurious but slippery, which can be a challenge, especially for beginners. My go-to for quick projects is felt—it’s forgiving and doesn’t fray. Ultimately, the fabric choice can make or break your embroidery, so test swatches before committing!
Customizing Your Embroidery Patterns
Explore effective techniques to personalize your embroidery patterns.
- Choose Your Colors Wisely: Select colors that resonate with your vision. Experiment with shades to convey the mood you desire.
- Alter Designs: Don’t hesitate to modify existing patterns. Add your unique touch by changing shapes or adding elements.
- Mix Techniques: Combine various stitching techniques to create a unique texture. A blend of satin and backstitch can elevate your design.
- Incorporate Personal Symbols: Use symbols that are meaningful to you. This can make the piece more intimate and reflective of your personality.
- Experiment with Sizing: Scale your patterns to fit different projects. A larger pattern may suit a wall hanging, while a smaller one is perfect for accessories.
- Adjust Fabric Choices: The fabric can drastically change the outcome. Choose unusual materials like canvas or felt for distinct results.
- Layering: Create depth by layering different designs on top of one another. This adds visual interest and complexity.
- Use Digital Software: Embrace digital tools for precise modifications. Programs like Adobe Illustrator make it easy to customize patterns.
Must-Have Accessories for Your Embroidery Kit
These essential accessories can significantly enhance your embroidery experience, making your projects smoother and more enjoyable.
- Embroidery Hoop: A good-quality hoop is essential for keeping your fabric taut and preventing puckering. I always recommend a sturdy wooden or plastic hoop that fits comfortably in your hands.
- Embroidery Needles: Using the right needles can make a world of difference. I prefer needles with a larger eye for ease with thicker threads and a range of sizes for different fabrics.
- Thread Organizer: An organized workspace leads to a more enjoyable experience. A thread organizer helps me keep my floss sorted by color, preventing tangles and confusion during projects.
- Scissors: Sharp, precise scissors are a must. I love my small embroidery scissors with a pointed tip for snipping threads cleanly without damaging my fabric.
- Fabric Markers: These come in handy for transferring designs onto fabric. I choose washable fabric markers that disappear with water or air, ensuring my fabric remains unblemished.
- Stabilizer: A good stabilizer supports your fabric during stitching, reducing distortion. I always keep a variety of stabilizers on hand for different projects.
- Pin Cushion: A pin cushion allows me to keep my needles and pins accessible and organized while I work, keeping my workspace neat and efficient.
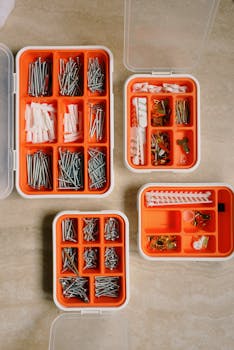
Maintaining Your Embroidery Kit
Keeping your embroidery kit organized and well-maintained is crucial for a smooth crafting experience. I recommend investing in a sturdy storage solution, like a tackle box or a dedicated craft organizer, to keep threads, needles, and fabrics separated. This minimizes tangling and ensures you can find what you need quickly. Regularly check your threads for signs of wear and replace any frayed or damaged strands. This step is essential for achieving clean, professional-looking stitches. Additionally, consider using acid-free containers for fabrics to prevent stains or degradation over time. Always clean your needles after use to avoid transferring oils from your fingers to your embroidery, which can lead to buildup. Lastly, keep an inventory of your supplies; knowing what you have on hand helps avoid duplicate purchases and inspires new projects. A well-maintained kit not only saves time but also enhances your overall enjoyment of embroidery.
Benefits of DIY Embroidery Kits
Exploring the reasons why DIY embroidery kits are essential for anyone interested in crafting.
- Sparks creativity and self-expression: With DIY embroidery kits, I find it incredibly liberating to explore my own designs. Each stitch becomes a reflection of my personal style.
- Convenience of all-in-one packages: These kits come with everything I need, from threads to needles, making it easy for me to start crafting without hunting for supplies.
- Learning opportunity: They provide the perfect chance to improve my skills. With easy-to-follow instructions, I can tackle new techniques at my own pace.
- Ideal for all skill levels: Whether I’m a beginner or have some experience, there’s a kit that matches my proficiency, making each project enjoyable and challenging.
- Great for stress relief: Engaging in embroidery has become my go-to method for relaxing. The rhythmic motion of stitching calms my mind and helps me unwind.
- Opportunity for personalized gifts: Projects completed from these kits make for heartfelt gifts. I love how each piece tells a story and shows that I’ve put thought into my presents.
Tips for Organizing Your Embroidery Space
Key strategies to enhance your embroidery workspace for creativity and efficiency.
- Designate a Dedicated Area: Clearly define a specific zone for your embroidery activities. This helps to mentally set apart your creative space from the rest of your home.
- Use Clear Storage Bins: Transparent containers make it easier to keep track of threads, fabrics, and tools. You won’t waste time rummaging around unseen boxes.
- Organize by Color: Sort your threads by color. This simple step makes it much easier to find the perfect shade while working on projects.
- Keep Tools Handy: Invest in a portable caddy or magnetic board to hold needles, scissors, and other essential tools. Having them close at hand boosts productivity.
- Establish a Cleaning Routine: Regularly tidy your space, ensuring scraps and dust don’t pile up. A clean workspace directly influences your creativity.
- Create a Project Board: Use a bulletin board to pin up your ongoing projects and inspirational images. This helps keep your ambitions in sight and maintains motivation.
Step-by-Step Guide to Starting Your First Project
Choose a project that resonates with you. Your excitement will drive your creativity. Gather all the necessary materials, keeping convenience in mind; this prevents distractions later. Set a clear workspace that inspires you and declutter your area for better focus. Next, sketch out a basic plan. This doesn’t have to be detailed, but it helps visualize the process. Break down the project into manageable steps; this makes it less daunting and keeps motivation high. As you work, remember to take breaks; allow your mind to recharge. Document your process, whether through photos or a journal; this will not only preserve your experience but also encourage others. Finally, trust your instincts and embrace imperfections; the creation is yours, and it’s beautiful as it is.
Exploring Different Types of Embroidery Techniques
Embroidery is a captivating art form with numerous techniques to explore. One of my favorites is cross-stitch, where you create designs by forming “X” shapes on a grid, making it perfect for beginners. Then there’s satin stitch, which produces a smooth, shiny surface and can add elegance to any project. Another exciting technique is stumpwork, involving raised and three-dimensional embroidery that truly brings your designs to life. I find free-motion embroidery to be liberating; it allows me to draw with the sewing machine, creating intricate patterns without the constraints of traditional stitching methods. For those who love textures, crewel embroidery uses wool thread and various stitches to create stunning, textured designs. Lastly, there’s redwork, which involves simple motifs stitched in red thread, offering a charming, vintage feel. Each technique has its unique appeal, and experimenting can lead to delightful results!
Top 5 Embroidery Projects for Beginners
Embroidery offers a splendid way to ignite creativity and develop new skills. These projects are perfect for those starting their embroidery journey and looking to build confidence while having fun.
- Handkerchief Embroidery: This classic project is ideal for beginners. You can personalize handkerchiefs with simple monograms or small florals, making them functional yet stylish. Choosing lightweight linen makes it easier to handle.
- Simple Embroidered Hoop Art: Creating a small piece of wall art in an embroidery hoop is immensely satisfying. Start with basic designs like geometric shapes or single-word quotes. This requires minimal materials and can brighten any room.
- Patches: Designing your own patches to sew onto jackets or bags can be a fun, practical project. You can sketch out your ideas, and experimenting with different stitches can help you discover unique styles.
- Embroidered Tote Bags: Personalizing a simple canvas tote bag with embroidery is a fantastic way to practice larger designs. It’s useful, easy to carry around, and you can show off your handiwork to the world.
- Bookmarks: Embroidered bookmarks make thoughtful gifts and are a great way to try out new stitches. You can use fabric scraps, which means this project is both economical and environmentally friendly.
Comparison of Popular Embroidery Threads
This table compares various popular embroidery threads based on several key parameters, highlighting their strengths and weaknesses for crafters:
| Thread Type | Material | Best For | Durability | Sheen |
|---|---|---|---|---|
| Polyester | Synthetic | General Embroidery | High | Moderate |
| Cotton | Natural | Quilting & Home Decor | Moderate | Matte |
| Rayon | Semi-synthetic | High-Sheen Designs | Low | High |
| Metallic | Metallic Threads | Decorative Stitching | Low | Very High |
| Wool | Naturally Derived | Hand Embroidery | Moderate | Low |
| Silk | Naturally Derived | Luxury Projects | Moderate | Very High |
Mar 30, 2024 … Share your videos with friends, family, and the world.
Sep 4, 2024 … … you guys will be too! More details about what's included in the kit can be found on my website Handfulofmade.com #Embroidery #EmbroideryKit …
Handful of Made | Embroidery & DIY | New DIY embroidery kit listed …
May 29, 2020 … What kind of embroidery needles, how much yarn do you need. Do you buy an embroidery starters kit or make your own? Start your embroidery …
Mar 17, 2021 … I think about this a lot because I make embroidery kits myself, as do many of my friends! For a lot of us, our kits are made with our past …
Mass-produced do-it-yourself embroidery kits like the one for this set of kitchen towels made it possible for middle-class women to create personalized home …
Empowering Embroidery | Smithsonian American Women’s History …
Essential Tools for Your DIY Embroidery Kit
An embroidery kit is incomplete without a few key tools that make the creative process smooth and enjoyable. My go-to tool is a set of sharp embroidery needles; the right size can significantly influence your stitching experience. I opt for a range of sizes to accommodate various thread types and fabrics. Another essential is high-quality embroidery thread. I recommend using cotton or silk threads for durability and a vibrant finish. A sturdy embroidery hoop keeps the fabric taut, preventing wrinkles and allowing for more precise stitching. Don’t underestimate the importance of fabric scissors; a good pair will make all the difference. Additionally, invest in a thread cutter or a small blade for quick access during projects. Lastly, a handy storage box is vital to keep everything organized and easily accessible. These tools are not just accessories; they are game-changers in your DIY embroidery journey.
How to Personalize Your Embroidery Designs
Personalizing your embroidery designs can truly make them one-of-a-kind. Start by choosing colors that resonate with your personality or the recipient. I often find that selecting a unique color palette can breathe new life into mundane patterns. Add initials, names, or significant dates to your designs; these elements transform a simple piece into a heartfelt gift. Use distinctive fonts and styles to create text that stands out—script fonts are my go-to for a personal touch. Don’t shy away from incorporating motifs that reflect hobbies or interests; for example, if you love gardening, flowers or garden tools can add extra character. Experimenting with different stitch types can alter the look significantly; I frequently play with textures to elevate the design’s visual appeal. Lastly, consider framing your embroidery in a way that complements the décor of your space—it’s the finishing touch that personalizes the piece further.
Troubleshooting Common Embroidery Mistakes
Thread breaking is one of the most frustrating issues I encounter. It often stems from using the wrong type of thread or incorrect tension settings. Check the thread path and ensure it’s correctly threaded through the tension discs. Fabric shifting during embroidery can ruin a design; using a sturdy stabilizer is essential. Always match the stabilizer to the fabric type and density.If you see puckering, it might be due to too tight of a hoop. Loosen it a bit, and make sure to use adequate tension while stitching. Color bleeding can occur if you’re using vibrant or water-soluble threads. Test your threads before starting on your main project. I’ve learned that keeping my workspace clean prevents dust from getting into the machine and affecting the stitching quality. Regular maintenance of my embroidery machine is non-negotiable to avoid technical hiccups.
Creative Embroidery Stitches to Explore
Exploring unique embroidery stitches breathes life into any project. The first stitch I recommend is the French knot; it adds a playful texture and dimension. It’s particularly effective for floral designs. Next, the satin stitch provides a smooth, rich finish ideal for filling shapes or creating solid areas of color. For something more intricate, consider the feather stitch. This versatile stitch creates delicate, feathery outlines that enhance the beauty of any piece. I also love utilizing the lazy daisy stitch, especially for casual motifs like flowers and leaves. It’s simple yet incredibly effective. Another favorite is the chain stitch, which not only adds visual interest but also works well for outlines and borders. I can’t forget about the backstitch, which is fundamental for precise detailing and can be used for outlines or text. Experimenting with these stitches revamps traditional embroidery techniques, offering endless possibilities.
As an Amazon Services LLC Associates Program participant, we earn advertising fees by linking to Amazon, at no extra cost to you.
What materials do I need for a DIY embroidery kit?
To kickstart your DIY embroidery adventure, gather these essential materials: Embroidery floss, which comes in various colors, is vital for creating vibrant designs. You’ll also need an embroidery hoop for tensioning the fabric, making stitching easier. A needle, preferably with a larger eye for easy threading, is crucial. Don’t forget fabric suitable for embroidery; cotton works great. Lastly, consider adding some scissors for trimming threads and a pattern to guide your work. Having these materials ensures a smooth crafting experience.
How long does it take to complete an embroidery project?
The time required for an embroidery project varies widely based on several factors. A simple design might take a few hours, while intricate ones can stretch into weeks or even months. Factors like the complexity of the pattern, the size of the piece, and your skill level play critical roles. Personally, I find that the level of detail I want to achieve greatly impacts the timeline. For beginners, expect to spend longer as you familiarize yourself with techniques. Ultimately, embrace the process; rushing through often compromises quality.
Can beginners successfully use an embroidery kit?
Absolutely, beginners can successfully use an embroidery kit. These kits are designed with newcomers in mind, offering pre-printed patterns, all necessary materials, and clear instructions. The step-by-step guides make it easy to start without feeling lost. I’ve seen countless beginners create beautiful pieces using these kits. The provided tools and threads are typically user-friendly, allowing even those with no prior sewing experience to enjoy the process. With a little practice, beginners can quickly gain confidence and develop their skills.
What are the best types of fabric for embroidery?
The best fabrics for embroidery are typically cotton, linen, and polyester blends. Cotton is especially versatile and holds embroidery well, while linen offers a crisp, textured finish. Polyester blend fabrics provide durability and resist wrinkling, making them ideal for clothing. For finer, detailed work, I often recommend using fabrics with a tighter weave like twill or broadcloth. Fleece and canvas can also work beautifully for certain projects, adding depth and character. Avoid stretchy materials like knits or spandex unless you are experienced, as they can be challenging to work with.
How do I care for my completed embroidery pieces?
Keep your completed embroidery pieces out of direct sunlight to prevent fading and maintain vibrancy. When cleaning, gently hand wash them in cool water with a mild detergent; avoid wringing or twisting. If pressing is necessary, use a low heat setting through a cloth to protect the stitches. For storage, choose acid-free materials and keep them in a dry, cool place to avoid moisture damage. Remember, your work deserves the best care!
Are there online resources for learning embroidery techniques?
Absolutely, there are countless online resources for mastering embroidery techniques. I recommend starting with YouTube, where channels like ‘Embroidery 101’ offer visual step-by-step tutorials that really enhance understanding. Websites like ‘Creativebug’ and ‘Bluprint’ provide structured courses covering various skill levels and styles. Don’t overlook craft blogs either; many offer free patterns and valuable tips. Joining forums and social media groups such as Facebook’s embroidery community can also provide instant feedback and support.
What should I do if my thread keeps tangling?
Stop what you’re doing immediately. A tangled thread can ruin your project and waste time. First, check the thread spool; it might be winding unevenly. Ensure it’s correctly positioned, allowing it to unwind smoothly. If the thread is frayed or damaged, change it. Next, rethread your needle and consider using a different type of thread for a more reliable experience. Keep your work area organized to minimize tangles; store threads in a box to prevent them from getting mixed up. Finally, practice patience when untangling; tugging too hard can lead to breaks.
Embroidery allows unlimited creativity, from simple patterns to intricate designs. I find it immensely satisfying to transform fabric into personalized art that reflects my style.
**Personalization sets your projects apart, adding layers of significance that mass-produced items lack.** Craft something that reflects your individuality—it’s the secret ingredient that transforms ordinary into extraordinary.
**Quality tools transform how I create.** I’ve noticed that superior materials lead to smoother processes and better results. **Every project feels more enjoyable and rewarding with the right tools.**
Every crafter makes mistakes, but the beauty lies in learning from them. With regular practice, techniques improve, and small errors become stepping stones to mastery. Embrace the process; your skills will flourish.


