


As an Amazon Services LLC Associates Program participant, we earn advertising fees by linking to Amazon, at no extra cost to you.
Step-by-Step Guide to Completing Your Bookmark
Gather your materials first. You’ll need cardstock or thick paper, scissors, markers, stickers, and any decorative items you prefer. Cut the cardstock to your desired bookmark size. A standard size is about 2 inches by 6 inches. After cutting, decide on a design. Whether it’s simple stripes or intricate floral patterns, sketch it lightly with a pencil. Once satisfied, it’s time to color in your design using the markers. Add texture and dimension with stickers or washi tape. After decorating, let everything dry if necessary. Then, laminate your bookmark for durability. You can use self-laminating sheets or get it done at a copy shop. Finally, punch a hole at the top and thread some colorful ribbon through for a polished look. Your unique bookmark is now complete! Ensure you enjoy your reading experience with this personal touch.
Benefits of Handmade Bookmarks
Exploring the unique advantages of crafting and using handmade bookmarks.
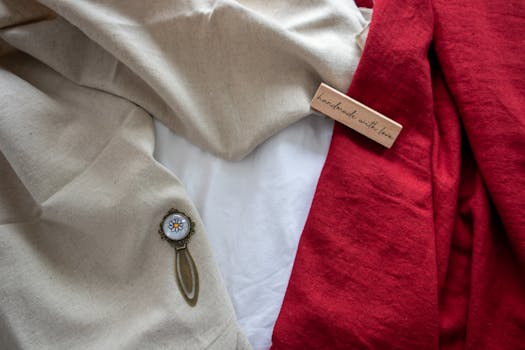
- Personal Touch: Each handmade bookmark carries my unique style and personality, making it truly special.
- Creativity Fuel: Crafting bookmarks lets me express my artistic flair, transforming simple paper into miniature masterpieces.
- Eco-Friendly: I love using recycled materials, which helps me reduce waste while creating something beautiful.
- Thoughtful Gifts: Handmade bookmarks are memorable gifts, showing my loved ones that I care and that I value their reading journeys.
- Perfect for Any Occasion: Whether celebrating a birthday or just because, I can create bookmarks to fit any theme or sentiment.
- Budget-Friendly: Crafting my own bookmarks is a cost-effective way to bring joy and creativity into my life.
- Customizable: I can tailor every detail, from size to design, ensuring it perfectly fits my or someone else’s aesthetic preferences.
Essential Tools for Embroidery Bookmarks
Investing in high-quality tools will transform your embroidery experience. Start with a reliable embroidery hoop to keep your fabric taut during stitching; this is non-negotiable for achieving clean, even stitches. I recommend a 6-inch or 8-inch hoop for smaller bookmarks, which perfectly fits the size and gives you the control needed. A good pair of embroidery scissors is essential. They should be sharp and precise, allowing for smooth cutting of threads and minimizing snags. Opt for scissors with a fine tip for detail work. Don’t underestimate the importance of embroidery needles. Choosing the right size and type—like sharp or ballpoint—will make your stitching easier and more effective. Stabilizers are crucial for maintaining fabric integrity. Use a lightweight tear-away stabilizer to support your stitches and prevent puckering. Lastly, a well-organized thread organizer can save you countless hours of frustration; sort threads by color or type for easy access. With these essentials, you’ll elevate your bookmark embroidery projects significantly.
Top Brands to Consider
Here are my go-to brands that stand out for their quality and creativity in the arts and crafts space.
- Michaels: A staple that offers everything from paints to yarn, Michaels frequently features sales that can help you stock up on your favorites without breaking the bank.
- Joann: Known for its extensive fabric selection, Joann is perfect for sewing enthusiasts and quilters. They often have unique seasonal designs that inspire creativity.
- Crayola: Timeless and reliable, Crayola is my go-to for vibrant colors in any medium. Their art supplies cater to both kids and adults, making them versatile.
- AC Moore: While not as ubiquitous as others, AC Moore has a fantastic assortment of craft supplies that often feature local artisan goods, giving a unique twist to projects.
- Fiskars: If you’re a paper crafter, Fiskars scissors and cutting tools are simply the best. Their ergonomic designs make precise cuts easier, enhancing any project.
- KnitPicks: For knitting and crochet enthusiasts, KnitPicks provides high-quality yarns and supplies at competitive prices. Their variety can inspire endless projects.
Check out our embroidered bookmark kit selection for the very best in unique or custom, handmade pieces from our bookmarks shops.
3Pcs Cross Stitch Bookmark Kits Flower Patterns DIY Stamped Embroidery Bookmarks for Beginners Tulip Sunflower Lavender Needlepoint Starter Kits
Mini KIT: hand embroidered corner bookmark / Custom letter felt corner / Easy DIY page holder. MoodyGreen.
Mini KIT: Hand Embroidered Corner Bookmark / Custom Letter Felt …
These 26 Cross Stitch Bookmark Patterns will save your place when you just have to put that book down. We have included a wide range of cross stitch …
Featured in the April 2023 'Relics & Ruin' OwlCrate box. Created with love by Four Seasons Fox and inspired by The Buried and the Bound, this Hedgewitch …
Tips for Beginners in Embroidery
Start with basic stitches. Mastering foundational stitches like the backstitch, satin stitch, and French knot is crucial. These will form the basis for more complex designs. Choose a simple pattern. Look for beginner-friendly patterns that don’t overwhelm you. Small projects help build confidence as you become familiar with your materials. Invest in quality tools. A good pair of embroidery scissors and a comfortable hoop can make a big difference. Poor tools can hinder your experience. Use high-quality floss. Cheap thread tangles and frays easily, which can lead to frustration. Premium brands often provide a smoother stitching experience. Practice tension. Keeping your tension consistent is key to achieving neat stitches. Don’t pull the thread too tightly, or the fabric may pucker. Embrace mistakes. Mistakes are part of the learning process. Don’t let them deter you; instead, use them as opportunities for growth.
Caring for Your Finished Embroidery Projects
To ensure your finished embroidery projects remain vibrant and intact, proper care is essential. Start by gently removing any excess threads and fabric scraps. Avoid pulling at loose threads; instead, snip them neatly to prevent fraying. For cleaning, I recommend spot cleaning with a damp cloth instead of submerging your piece in water. This method preserves the fabric and stitches. If you must wash the project, turn it inside out and use a gentle cycle with cold water.
I always allow my projects to air dry flat to prevent distortion. Never wring or twist your embroidery; it can compromise the shape and stitches. Once dry, ironing may be necessary, but use a low heat setting and a pressing cloth to avoid direct contact. Store your projects in a cool, dry place, away from sunlight to prevent fading. Using acid-free tissue paper can help maintain shape and prevent creasing. Regular maintenance and careful handling will keep your cherished pieces looking their best.
Basic Stitches for Embroidery
Mastering these basic stitches will open up a world of embroidery possibilities, empowering you to express your creativity on fabric.
- Running Stitch: This simple stitch forms the foundation of many embroidery techniques. It’s perfect for outlining shapes or creating a delicate pattern.
- Backstitch: I love using backstitch for its clean, defined lines. It’s ideal for lettering and joining sections of fabric seamlessly.
- Satin Stitch: The plush texture of satin stitch is a game changer. I often use it for filling areas and adding depth to designs.
- Chain Stitch: Chain stitch creates a lovely textured line. It’s versatile, working beautifully for borders or as a highlight in larger designs.
- French Knot: This tiny embellishment packs a punch. I often sprinkle French knots throughout my pieces for a touch of whimsy.
- Split Stitch: Perfect for outlining or filling, split stitch offers a smooth, continuous line that enhances your embroidery projects.
- Cross Stitch: This classic stitch is a fantastic way to create pixelated designs. I personally enjoy its straightforward technique and colorful results.
Aug 23, 2022 … Manager – Human Resources (and for the generous welcome kit)!… | 168 comments on LinkedIn. … From the intricate Chikankari and Mukaish …
How to Personalize Your Embroidery Bookmark
Creating a personalized embroidery bookmark is one of my favorite art projects. Start by selecting fabrics that resonate with you—maybe a soft cotton with a fun pattern. The size matters too; I typically go for 2 inches by 6 inches for easy use. Next, choose or design a motif that speaks to your personality. Whether it’s your favorite flower, a meaningful quote, or an intricate geometric design, it should reflect who you are. Use vibrant thread colors that complement your fabric, and don’t be afraid to mix shades for dimension. I personally love a multi-colored thread for a playful touch. Get creative with stitching techniques. Simple back stitches can create stunning outlines, while French knots add texture. To finish, consider adding a charm or tassel for an additional flourish. This small personal touch transforms an ordinary bookmark into a cherished keepsake.
Advanced Techniques to Enhance Your Bookmarks
Enhancing bookmarks is a fantastic opportunity to express creativity and personalize your reading experience. One effective method is to incorporate mixed media; using textured papers, fabric, or even small embellishments like buttons can make your bookmarks stand out. Adding quotes or inspirational messages using beautiful hand lettering can transform a simple bookmark into a motivational tool. I personally love using watercolors to create fluid backgrounds that add depth and color, followed by a layer of clear packing tape or laminate to increase durability.
Consider experimenting with shapes and sizes—try creating oversized bookmarks for larger books or tiny ones for journals. Designing bookmarks that double as gifts or notes can also be a personal touch for friends. Lastly, using your computer to print designs or images can give a polished finish, making each bookmark both functional and a piece of art.
Creative Design Ideas for Custom Bookmarks
Creating custom bookmarks is a delightful way to marry function with artistry. One of my favorite ideas is to repurpose old postcards or greeting cards. Simply cut them into bookmark shapes and add a personal touch with stickers or washi tape. Another unique concept involves using fabric scraps. Sew two pieces together, turning them inside out for a durable and charming bookmark. You can also try watercolor painting on thick paper. The fluidity of watercolors often results in stunning effects, making each bookmark a mini masterpiece. Don’t overlook the power of a good quote; type or handwrite your favorites on a decorative card and laminate them for longevity. Lastly, incorporate natural elements like pressed flowers or leaves between sheets of clear plastic. This design is not only beautiful but also connects your reading experience with nature.
Where to Find the Best Bookmark Kits Online
For the best bookmark kits online, I highly recommend checking out sites like Etsy and Amazon. Both platforms offer a variety of unique and customizable options. On Etsy, you’ll find handmade kits from independent sellers, which often include high-quality materials. My personal favorite sellers on Etsy include ‘Bookmark Bliss’ and ‘Crafty Bookworm’, known for their intricate designs and thoughtful themes.Amazon is fantastic for bulk buying or starter sets, particularly if you’re looking to make a lot of bookmarks at once. Brands like ‘Darice’ and ‘Artistic Artisan’ offer affordable kits that include everything from cardstock to embellishments. If you prefer a more curated experience, check out online craft stores like Michaels or Joann. They frequently have sales and a range of kits suitable for all ages. Don’t forget to explore local craft supply websites too; they often have exclusive kits available!
Choosing the Right Embroidery Bookmark Kit
Selecting the right embroidery bookmark kit can significantly enhance your crafting experience. First, consider the complexity of the design. For beginners, I recommend simple patterns that introduce basic stitches without being too daunting. Check the stitch count and thread variety; a diverse color palette can make your bookmark visually appealing. Look for kits that include high-quality materials, as they’ll ensure a smoother stitching process and a professional finish.
Next, pay attention to the size. If you’re short on time, choose smaller kits that can be completed in one sitting. Additionally, the inclusion of detailed instructions is crucial, particularly for those new to embroidery. A well-illustrated guide will help navigate the learning curve. Consider your personal style too; picking a kit that resonates with your interests will make the overall project more enjoyable.
Ideas for Presentation or Gift Wrapping
Explore creative ideas that will make your gifts stand out and bring an element of artistry to your presentations.
- Use kraft paper for a rustic look. This versatile base can be personalized with stamps, drawings, or even fabric pieces for a unique touch.
- Incorporate recycled materials. Old maps, newspapers, or magazines can give your gift wrapping a vintage flair while helping the environment.
- Add natural elements like twine, pinecones, or dried flowers. Not only do they look beautiful, but they also add a textured, organic feel that makes gifts feel thoughtful.
- Customize tags with your own artwork or calligraphy. A hand-written note makes a gift personal and often becomes a keepsake for the recipient.
- Wrap with fabric instead of traditional paper. Furoshiki, the Japanese art of wrapping with cloth, not only looks elegant but can also be reused by the recipient.
- Use bold washi tape to secure wraps. This decorative tape adds color and can create lovely patterns without the need for scissors or sheets of tape.
- Create a themed wrap. For example, a cooking-themed gift can be wrapped in kitchen towels or apron fabric, making the presentation coherent and enjoyable.
Popular Materials Used
A detailed look at the essential materials that can enhance your crafting experience.
- Acrylic Paint: Vivid colors and quick-drying properties make acrylic paint a favorite for canvases and crafts. Its versatility allows for blending and layering techniques.
- Cotton Yarn: Soft and durable, cotton yarn is perfect for knitting and crocheting projects. Its breathable nature ensures comfort in clothing or accessories.
- Watercolor Paper: Designed to handle moisture without warping, watercolor paper is essential for artists who work with water-based paints. The texture influences the outcome of your artwork.
- Balsa Wood: Lightweight and easy to cut, balsa wood is ideal for model building and crafting. Its forgiving nature makes it approachable for beginners.
- Cardstock: Heavier and sturdier than regular paper, cardstock is the go-to for paper crafts, cardmaking, and scrapbooking. Its availability in various colors adds flair to your projects.
As an Amazon Services LLC Associates Program participant, we earn advertising fees by linking to Amazon, at no extra cost to you.
What materials are typically included in an embroidery bookmark kit?
Embroidery bookmark kits usually contain several essential materials. First, you’ll typically find printed fabric or canvas, which serves as the base for your design. Most kits include embroidery threads in different colors, allowing for various designs and interpretations. A needle is always included for stitching, alongside a hoop to hold the fabric taut. Some kits also come with patterns or templates to guide you through the project. Lastly, you might find embellishments like beads or ribbons to personalize your bookmark further.
Can I use my own patterns for embroidering bookmarks?
Absolutely! Using your own patterns for embroidering bookmarks is not only possible but highly encouraged. I believe personalizing your bookmarks with designs that reflect your style or interests makes the project even more rewarding. You can create patterns from your sketches, favorite quotes, or even digital designs. Just ensure your chosen fabric can withstand the embroidery process. Experiment with sizes and colors to make your bookmarks stand out. Sticking to simple shapes can ease the process, especially if you’re a beginner. Remember, the more unique the design, the more special the bookmark will be!
How long does it typically take to complete a bookmark?
The time required to create a bookmark largely depends on the complexity of the design and the materials used. Simple paper bookmarks can be finished in under 30 minutes, especially if you’re just cutting, decorating, and laminating basic shapes. More intricate designs, like fabric or mixed-media bookmarks, may take an hour or more. As you gain experience and confidence, you’ll likely find yourself completing projects faster. Ultimately, the process should be enjoyable, so take your time to create something you love!
What is the best fabric for embroidery bookmarks?
The best fabrics for embroidery bookmarks are cotton and linen. These materials provide a desirable balance of sturdiness and flexibility. Cotton, particularly, is easy to work with and holds vibrant colors beautifully. Linen is slightly more textured and adds a touch of elegance, but can be trickier for beginners. If you want a more unique texture, consider using felt. It’s thick and sturdy, perfect for bookmarks that withstand daily use. Ultimately, your choice should reflect both your design preferences and your skill level.
Are embroidery kits suitable for children?
Yes, embroidery kits can be suitable for children, especially those designed specifically for younger crafters. These kits often include simple patterns and child-friendly materials that make the learning process enjoyable and safe. It’s crucial to choose age-appropriate kits, as some may have small parts or complex techniques that aren’t suitable for younger children. Additionally, having adult supervision can enhance the experience, providing guidance and ensuring safety while exploring creativity. Overall, embroidery can be an engaging and rewarding activity for kids, allowing them to develop fine motor skills and express their artistic side.
How do I fix mistakes in my embroidery?
The first step is to assess the mistake critically. Depending on the error, you may need to pull out a few stitches or completely remove the motif. Use a seam ripper for precise removal to avoid damaging the fabric. Afterward, determine if you can stitch over the error or if you need to start anew. For small imperfections, adding embellishments or turning them into design features can be a creative fix. Lastly, always take time to check your work frequently during stitching; it helps catch issues early on and reduces the likelihood of more extensive fixes later.
Can I wash my embroidered bookmarks?
Yes, you can wash your embroidered bookmarks, but it requires caution. I recommend hand-washing them in cold water with a mild detergent to preserve the embroidery. Avoid using bleach or fabric softeners, as they can damage your bookmarks. Don’t wring or twist them; simply lay them flat to dry. If your bookmarks feature delicate or intricate designs, consider spot cleaning instead. Always check for specific care instructions based on the materials used.
**Embroidery bookmarks are the perfect fusion of creativity and practicality.** They add a personal touch to your reading experience while showcasing your artistic skills. Each stitch transforms a mundane bookmark into a unique piece of art, enhancing both form and function.
Using a kit eliminates guesswork and frustration. Everything needed is included, making it easy to focus on creating. This support encourages beginners to experiment and build confidence.
Personalizing bookmarks transforms ordinary reading into a deeply meaningful experience. Each bookmark becomes a cherished reminder, intertwined with memories and inspirations.
Experimenting with different stitches radically transforms your designs. Each stitch adds a unique texture, depth, and personality, making your projects truly eye-catching and original.
Embroidery cultivates fine motor skills through precise movements and careful threading. It demands patience as each stitch requires focus, helping to enhance concentration and attention to detail.
Regular upkeep is essential. I’ve noticed that neglecting even minor details can diminish the beauty of a project. Maintaining your work not only preserves its appeal but also inspires you to keep creating.
Joining online crafting communities has profoundly enriched my creative journey. The support and encouragement from fellow crafters ignite new ideas and push my artistic boundaries.


