


As an Amazon Services LLC Associates Program participant, we earn advertising fees by linking to Amazon, at no extra cost to you.
Recommended Brands for Quality Embroidery Tools
These brands consistently deliver exceptional quality and performance in embroidery tools.
- Brother: I love Brother embroidery machines for their user-friendly features and reliability. They are perfect for both beginners and experienced crafters.
- Janome: Janome stands out for its innovative technology and precise stitching. I find their machines to be powerful and versatile, making any project a joy.
- Bernina: There’s something magical about Bernina’s craftsmanship. Their embroidery machines are robust and offer unrivaled stitch quality, making them worth the investment.
- Elna: Elna tools always catch my eye because of their excellent build and ease of use. They balance quality with affordability, which is a huge plus.
- Singer: I can’t overlook Singer, especially for anyone starting out. Their machines are dependable and have a long-standing reputation for delivering great results.
- Mettler: For threads, Mettler is my go-to. Their embroidery threads come in a stunning array of colors and glide smoothly through the fabric.
- Sulky: Sulky’s stabilizers are essential in my toolkit. They provide fantastic support and prevent any fabric mishaps while I create detailed designs.
- DMC: For those using floss, DMC’s threads are the gold standard. I find their colors vibrant and the strands smooth, perfect for intricate designs.
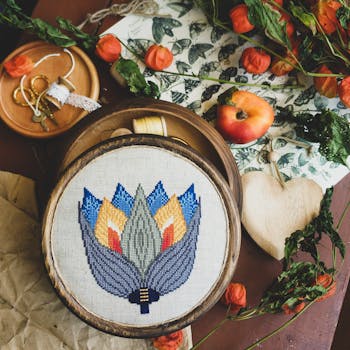
Top Features to Look for in a Large Embroidery Kit
Essential aspects that enhance your embroidery experience and creativity.
- A Variety of Thread Colors: A diverse color palette is crucial. I love kits that offer at least 50 different shades, allowing for creative flexibility.
- Quality Fabric: Durable and high-quality fabric can make a significant difference. Opt for kits with cotton or linen blends that provide a great base for your work.
- Comprehensive Instructions: I appreciate kits that come with detailed step-by-step guides. These are vital for enhancing skill levels, especially for beginners.
- Multiple Hoops: Having different sizes of embroidery hoops is incredibly helpful. It allows me to switch between projects easily and manage my work effectively.
- Variety of Needle Types: A selection of needles for different techniques can make the process smoother. It’s often the little details that enhance the overall experience.
- Included Designs: Look for kits that offer a range of design templates. This inspires creativity right from the start and saves time.
Step-by-Step: Starting Your First Large Embroidery Project
First, choose a pattern that excites you. I recommend selecting a design you genuinely love, as this will keep you motivated throughout the project. Next, gather all your supplies, including fabric, embroidery hoops, needles, and floss in the colors you need. Don’t scrimp on quality; investing in decent materials pays off in both the finished look and your experience. Pre-wash your fabric to prevent any shrinkage later. Once you’ve prepared your workspace, transfer your pattern onto the fabric using your preferred method. I often use a light box or a fabric pen. Start with the largest areas and work your way down to the smaller details, which gives a sense of progress that’s incredibly motivating. Keep your floss organized to avoid tangles. As you embark on this project, remember to take breaks. Enjoying the process is just as important as the final product.
Choosing the Right Large Embroidery Kit
Selecting the perfect large embroidery kit requires careful consideration of several factors. First, think about the design you want to create; choose a kit that resonates with your personal style and interests. The quality of materials is crucial — look for kits that include high-quality threads and fabric, as they impact the overall outcome and durability of your finished piece. I always recommend checking if the kit includes easy-to-follow instructions and an appropriate needle. This can significantly reduce frustration, especially if you’re still honing your skills. Additionally, consider the experience level the kit is aimed at; some are designed for beginners while others are meant for more experienced embroiderers. Ensure the sizing of the kit suits your workspace and project goals. A larger canvas can be more forgiving and allow for more intricate designs, which I find particularly rewarding to work on.
Benefits of Using Quality Materials for Embroidery
Exploring the advantages of selecting high-quality materials for embroidery projects.
- Durability: High-quality materials withstand wear and tear much better than cheaper alternatives, ensuring that your creations last longer.
- Color vibrancy: Using superior threads and fabrics results in striking colors that resist fading, keeping your artwork fresh and eye-catching.
- Better texture: Quality materials provide a smoother, more enjoyable experience when embroidering, resulting in cleaner stitches and an overall polished finish.
- Reduced fraying: Premium fabrics tend to minimize fraying, which means less hassle during the embroidery process and a neater final product.
- Increased precision: Higher quality threads and needles offer better control, allowing for intricate designs and finer details without the risk of breakage.
- Long-term investment: While quality materials may come with a higher upfront cost, they ultimately save money by reducing the need for frequent replacements due to damage or wear.
Joining an Embroidery Community: Tips and Benefits
Joining an embroidery community can be one of the best moves you make as a craft enthusiast. First, finding local or online groups opens doors to new techniques and styles that you might not discover alone. Participating in discussions or workshops helps you gain feedback and insights, which can enhance your skills remarkably. Moreover, being part of a community fosters a sense of belonging; it’s tremendous to connect with those who share your passion. To get the most from your experience, start by sharing your work and asking for tips. Look for community challenges or themed projects to keep you engaged. Platforms like Instagram or Facebook can provide a wealth of inspiration, while forums dedicated to embroidery allow for deeper discussions. Lastly, don’t underestimate the joy of making friends who can turn into lifelong cheerleaders for your craft!
May 25, 2023 … In this tutorial, you'll learn how to create really cool patches. I'll use a hoodie as a test object and show you a cool non-destructive workflow.
Creative Ideas for Large Embroidery Designs
Large embroidery designs can be a fantastic way to make bold artistic statements. Consider creating a stunning wall hanging that combines a variety of stitches and textures to create depth. For instance, a botanical theme can incorporate 3D elements like raised flower petals for a dynamic effect. Utilizing a unique color palette can transform a traditional pattern into something modern and eye-catching. Try blending different shades of the same hue to create an ombre effect in larger pieces.
Another engaging idea is to create a family tree or a personalized monogram piece, allowing each leaf or letter to represent a family member or a significant date. This not only adds a personal touch but also makes for a cherished keepsake. Incorporating fabric types and weights will enhance the design further; heavy linens or silks can carry intricate stitching beautifully. Large designs also allow for storytelling elements—craft scenes or motifs that depict cherished memories or beliefs in rich detail.
Inspiration from Expert Embroiderers
Expert embroiderers are a wellspring of creativity and technical skill that inspires every stitch I take. Their artwork pushes the boundaries of traditional embroidery, showcasing diverse techniques that turn fabric into storytelling canvases. Watching these artisans transform ordinary threads into intricate designs ignites a passion within me to experiment and innovate.
Learning from their mastery, I find value in their unconventional approaches. For instance, blending various stitches not only enhances texture but also enriches the narrative of my projects. I’ve often noticed how they use color theory to evoke emotion — a lesson I’ll carry into my work. Engaging with their tutorials reveals tricks and insights that elevate my skill set beyond what I thought achievable.
Connecting with this community influences my style, showing that each piece can be a reflection of personal expression. The world of expert embroiderers inspires a journey of continuous learning and experimentation, pushing my creativity to new heights.
Common Mistakes to Avoid in Large Embroidery
One of the biggest blunders I see is not stabilizing your fabric properly. Large embroidery projects demand extra attention to stabilize the fabric to prevent puckering or shifting during stitching. Using the wrong needle type is another major pitfall. A universal needle may not be sufficient for thick or specialty fabrics. Choose a needle that complements your project. Not testing the design on scrap fabric can lead to disastrous results. Always run a trial on similar material to make adjustments before committing to the final piece. Thread tension is crucial and often overlooked. Check and adjust tension settings on your machine to avoid thread breakage or uneven stitching. Finally, rushing the process can ruin a potentially beautiful project. Take your time, follow your design meticulously, and enjoy the art of creating.-
Frequently Asked Questions About Large Embroidery Kits
Many people wonder if large embroidery kits are suitable for beginners. Absolutely, as long as the kit comes with clear instructions. I’ve tackled several large kits, and they often introduce new techniques that enhance skills. Another common question revolves around the time commitment. Expect to invest several hours, even days, depending on your pace and complexity of the design. It’s easy to underestimate how enjoyable this process can be! Additionally, some might worry about the cost. While large kits can be pricier, they often include high-quality materials that justify the price. Many kits also provide comprehensive color charts, which eliminates guesswork. A frequent concern is maintaining motivation throughout the project. Staying engaged is critical, and breaking the project into smaller goals can keep you inspired. Finally, I often hear, ‘What if I make a mistake?’ Remember, embroidery allows creativity; mistakes often lead to unexpected, beautiful results!
Essential Tools for Embroidery Success
Choosing the right tools can make or break your embroidery projects. First, a quality embroidery machine is essential. I prefer machines with multiple stitch options; it opens up endless possibilities for creativity. Next, invest in a reliable set of embroidery needles. Using the correct needle size and type for your fabric will drastically improve your stitch quality. Don’t skimp on embroidery threads; high-quality threads offer vibrant colors and durability. A sturdy hoop is also important; it keeps your fabric taut while working, preventing puckering. I find that having a variety of hoop sizes handy allows for versatility in different projects. Finally, don’t overlook the importance of good scissors and snips. Precision trimming makes a huge difference. As you gather these tools, remember that the right supplies complement your artistic flair and contribute significantly to your success in embroidery.
How to Care for and Maintain Your Finished Embroidery
Protect your artwork from direct sunlight. Excessive exposure can fade colors over time. I prefer to display my embroidery in shaded areas or use UV-filtering glass for framed pieces. Dust your finished projects regularly. A soft, lint-free cloth or a gentle brush works wonders. Avoid using any sprays or cleaners that could damage the fabric. Store embroidered pieces in breathable fabric. Cotton or linen bags are perfect. Avoid plastic, as it can trap moisture and lead to mildew. If you must wash your embroidery, hand wash it gently. Use cold water and a mild detergent, and air-dry it flat. I always lay a clean towel underneath to absorb excess moisture, which helps maintain shape. For those pieces that may have creases, a low-temperature iron is preferable—just place a cloth between the iron and fabric to avoid direct contact. Finally, keep your embroidery away from pets and small hands that may unintentionally cause damage.
Full coverage bead embroidery kit. Brand New! Fabric: gabardine Canvas Size: 58*41 cm Colours: 43 Embroidery technique: half cross-stitch Coverage: fully …
Bead embroidery kit Full coverage landscape pattern, Large hand …
Beautiful embroidery kits for all levels, from beginner to advanced. Crewelwork, blackwork, goldwork, stumpwork and many more unique designs.
Check out our large embroidery kit selection for the very best in unique or custom, handmade pieces from our kits shops.
top of page. Ellbie Co. Logo. Advent calendars are launching 27th July 10AM Join our mailing list to get 10% off your first order!
This lovely, medium-size design — printed onto pure cotton cloth — is ready to embroider. Image size: A3 (42 x 29.7cm) A4 (29.7 x 21cm) printed onto a large …
Playtime A3 (Large) embroidery panel, ready to embroider – Dicraft …
Tips for Organizing Your Embroidery Space
Practical strategies to create an efficient embroidery workspace.
- Designate Specific Zones: Create areas for different tasks, like a stitching zone, storage, and a display space. This keeps everything easily accessible and visually appealing.
- Use Clear Storage Bins: Opt for transparent containers to categorize threads, fabrics, and embellishments. This allows for quick identification and saves time hunting for supplies.
- Utilize Vertical Space: Install shelves or pegboards. They can hold tools, patterns, and other necessities without cluttering up your workspace.
- Keep Essentials Within Reach: Your most-used tools should be located on the table or a nearby caddy. It maximizes efficiency and minimizes distractions while working.
- Regularly Declutter: Take time to evaluate what you really use. Donate or discard anything that no longer serves a purpose; it clears the mind and the space.
- Create a Color Palette Board: Organize threads and fabrics by color on a board. It helps inspire your projects and keeps everything coordinated.
Popular Types of Large Embroidery Kits
Exploring various large embroidery kits that are perfect for tackling ambitious projects and expanding your skills.
- Floral Embroidery Kits: These kits often feature intricate designs with vibrant colors, making them ideal for anyone who loves nature. They allow you to create stunning wall art that brightens up any space.
- Animal Portrait Kits: These are perfect for animal lovers. The kits usually include detailed patterns and realistic colors, pushing your embroidery skills to new heights as you bring these creatures to life.
- Abstract Patterns: Great for those who enjoy playing with shapes and colors rather than replicating real-life images. These kits encourage creativity and personal expression, resulting in unique, one-of-a-kind pieces.
- Seasonal Themes: Kits that reflect different seasons like Halloween, Christmas, or spring provide a fun way to celebrate throughout the year. Each stitching project turns into a festive decoration, adding charm to your home.
- Cultural Designs: Embroidery kits based on traditional patterns from various cultures allow you to celebrate global artistry. They give you a chance to learn new techniques while honoring rich textile histories.
- Home Décor Kits: These kits often feature larger projects like pillows or wall hangings. They not only challenge your skills but also provide functional art pieces that enhance your living space.
As an Amazon Services LLC Associates Program participant, we earn advertising fees by linking to Amazon, at no extra cost to you.
How long does it take to complete a large embroidery project?
The time required for a large embroidery project can vary significantly based on several factors. I find that, on average, it can take anywhere from several days to a few weeks. Your skill level, the complexity of the design, and the amount of detail will drastically influence the timeline. For intricate designs with lots of colors, I often spend a minimum of 10-20 hours. Breaking the project into smaller tasks helps manage time better and keeps motivation high. If you’re meticulous like me, don’t rush; enjoy the process and watch your piece come to life.
What materials are typically included in a large embroidery kit?
Large embroidery kits usually contain essential components. You can expect to find a variety of embroidery threads, typically in different colors and materials like cotton or silk. Most kits also include needles, which are vital for stitching. A suitable fabric, often pre-printed with a design, is usually included to get you started right away. Many kits provide an embroidery hoop to maintain tension in the fabric as you work. Instructions or patterns for guidance are commonly part of the package. Some kits might even offer additional items, such as scissors, extra embellishments, or storage containers for your supplies.
Can beginners use large embroidery kits?
Absolutely, beginners can use large embroidery kits. While they might seem intimidating at first, these kits can be incredibly beneficial. They often come with all necessary supplies and detailed instructions, making them accessible. The key is to break down the project into smaller sections. This allows you to focus on mastering techniques gradually. Embrace the process, make mistakes, and learn as you go. Ultimately, large kits can provide a sense of accomplishment that keeps you motivated.
What types of designs work best for large embroidery?
Bold, simple designs often shine in large embroidery projects. Intricate details can get lost in larger formats, so I prefer designs that have a clear, defined outline. Geometric shapes, blocks of color, and large floral patterns also work spectacularly. Using limited color palettes enhances visibility and impact. Text with strong fonts can also make statements without becoming cluttered. Avoid highly detailed images; simplicity is key for stunning large embroidery.
Are there online resources for embroidery tutorials?
Absolutely, there are countless online resources for embroidery tutorials that cater to all skill levels. I personally find YouTube a fantastic platform, home to hundreds of channels offering free videos on stitching techniques, patterns, and tips. Websites like Craftsy and Skillshare also feature paid courses with professional instructors, which can be incredibly beneficial. For more detailed written guides, blogs like Embroidery Library provide step-by-step articles that can enhance your learning. Don’t overlook Pinterest, either; it’s a goldmine for creative ideas and links to tutorials.
How do I fix mistakes made during embroidery?
First, assess the mistake. If it’s a small error like a misplaced stitch, you can usually unpick it using a seam ripper or stitch remover. Take your time to avoid damaging the surrounding fabric. For larger mistakes, consider using your fabric’s natural properties; sometimes, soaking can help loosen the stitches. Another effective method is to creatively integrate the mistake, turning it into an artistic element. If the fabric has small holes after removing stitches, a patch or decorative embellishment might be the right solution. Don’t stress about perfection; embrace the uniqueness of your craft!
What is the best way to frame or display my finished embroidery?
Choosing the right frame makes all the difference. I prefer wooden frames for a rustic touch, but metal can add a sleek modern feel. Use acid-free materials to avoid damaging the fabric over time. Consider using a mat to elevate the piece; it adds depth and contrast. If it’s a smaller piece, a shadow box can highlight its texture beautifully. For an unconventional display, I’ve mounted pieces on canvas or created a DIY embroidery hoop wall art. Each method tells a different story and reflects your personal style.
Choosing a kit that aligns with your skill level is crucial. A beginner will feel frustrated with advanced projects, while seasoned crafters might find novice kits boring. Pick wisely to ensure enjoyable crafting experiences.
High-quality needles and threads make a world of difference in your craft projects. They ensure smooth stitching, reduce frustration, and enhance the overall appearance of your work. Don’t compromise on these essentials!
Creativity takes time. I’ve learned to relish each step, whether it’s the mess of paint or the frustration of a difficult stitch. Embracing the process cultivates deeper satisfaction.
**Connecting with fellow enthusiasts is essential.** Sharing ideas and experiences fuels creativity. **Don’t underestimate the power of collaboration; it transforms artistic journeys.** Seek out groups or online communities to boost your motivation.
Every creative project should be a reflection of who you are. Incorporating your tastes, preferences, and experiences into your designs makes them unique and personal. This adds authenticity and joy to the crafting process.
Taking good care of your embroidery projects is essential for longevity. Regular cleaning, proper storage, and gentle handling can protect them from wear and fading, ensuring they remain beautiful for years to come.


